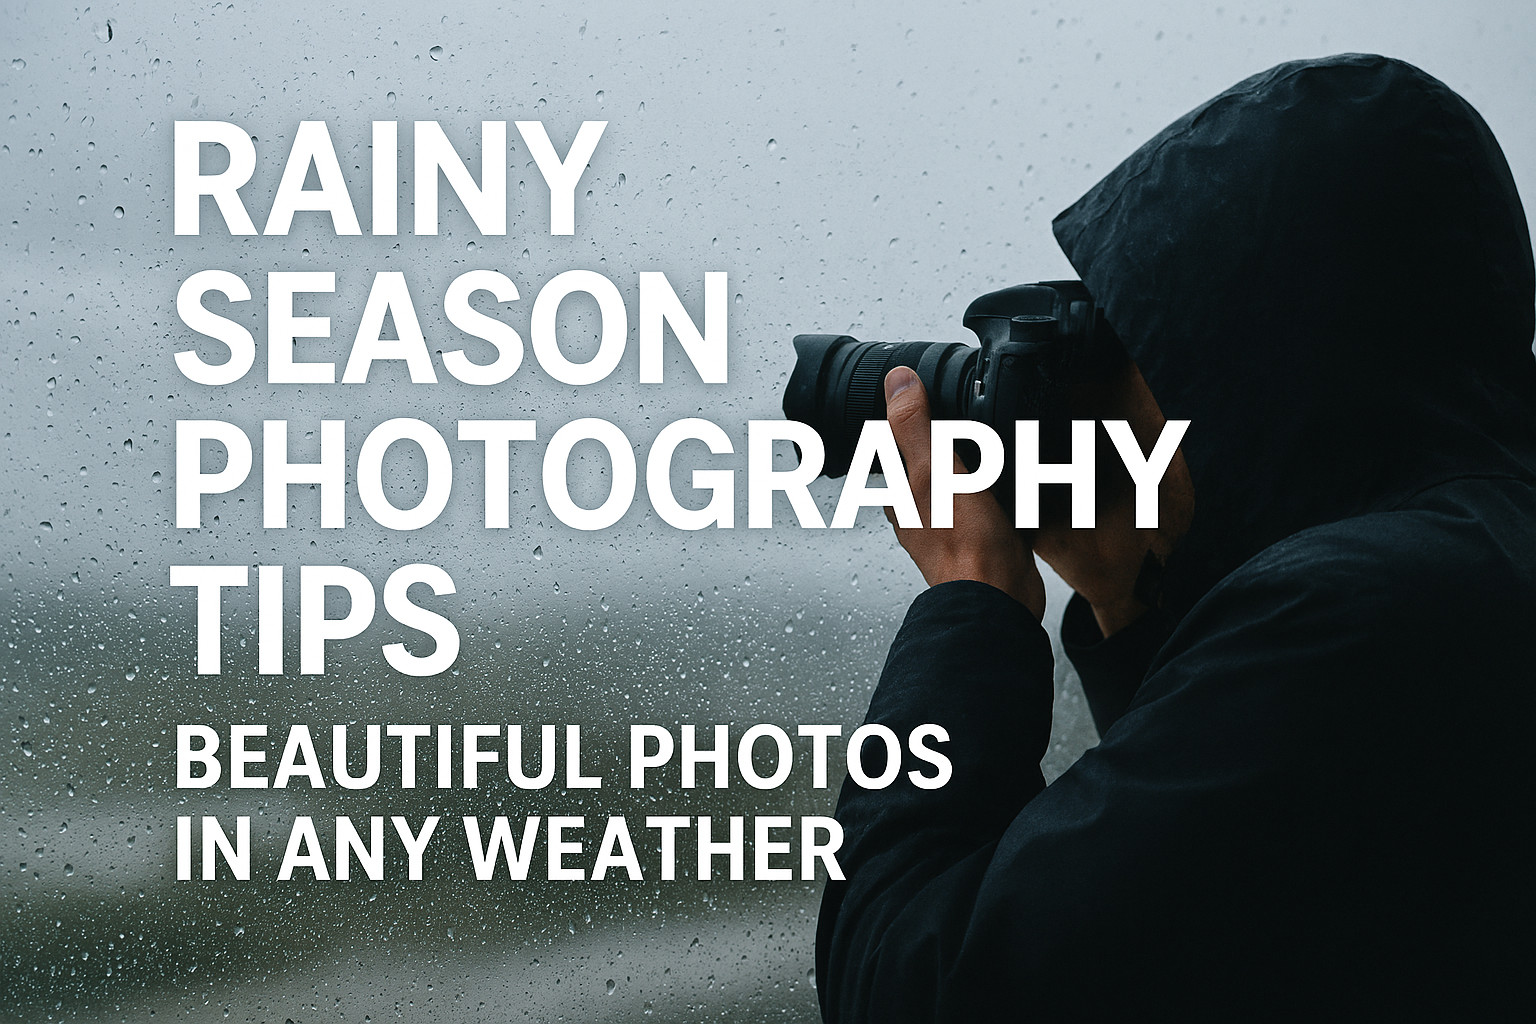
The rainy season often makes photographers nervous, with many choosing to reschedule outdoor sessions at the first sign of clouds. However, rain and overcast skies can actually create some of the most dramatic, romantic, and unique photographs you’ll ever take. The soft, diffused light, vibrant colors, glistening surfaces, and moody atmosphere that come with rainy weather offer creative opportunities that simply don’t exist on bright, sunny days. Whether you’re a professional photographer working with clients or someone looking to capture beautiful memories despite the weather, understanding how to work with rain rather than against it can transform potential disappointment into stunning results. In this guide, we’ll share essential tips for creating beautiful photographs during the rainy season, from protecting your equipment to embracing the unique aesthetic qualities that wet weather brings. Don’t let a little rain dampen your photography plans—learn to make the most of every weather condition and discover that some of your favorite images might just come from the cloudiest days.
Embrace the Unique Lighting and Mood of Rainy Days
One of the biggest advantages of rainy weather is the incredibly soft, even lighting it provides. Overcast skies act as a giant natural diffuser, eliminating harsh shadows, reducing contrast, and creating beautifully flattering light for portraits. This means you can shoot at any time of day without worrying about unflattering midday sun or squinting subjects. The colors during rainy weather also become more saturated and vibrant—greens appear richer, flowers pop with intensity, and wet surfaces reflect light in magical ways. Embrace the moody, romantic atmosphere that rain creates rather than fighting it. Rainy day photos have a distinctive aesthetic: intimate, cozy, and emotional. For engagement sessions or portraits, this weather can enhance the feeling of closeness between subjects as they huddle under an umbrella or splash through puddles together. For landscape photography, fog and mist add layers of depth and mystery that are impossible to achieve in clear weather. Instead of trying to make rainy day photos look like sunny day photos through editing, lean into the cooler color temperatures, soft contrasts, and atmospheric qualities. Adjust your mindset from “the weather ruined my shoot” to “the weather created unique opportunities,” and you’ll find yourself discovering creative possibilities you never considered. The key is preparation and attitude—when you’re ready for rain and excited about its creative potential, you’ll capture images with a distinctive mood and beauty that sunny-day photography simply cannot replicate.
Protect Your Equipment While Staying Creative
While rain offers creative opportunities, it also presents real risks to your camera equipment, so proper protection is essential. Invest in quality rain covers or rain sleeves designed specifically for cameras—these inexpensive accessories can save thousands of dollars in equipment damage. In a pinch, you can create a DIY rain cover using a plastic bag with a hole cut for the lens, secured with a rubber band, though proper photography rain gear works much better. Use a lens hood always, as it provides the first line of defense against rain hitting your lens glass. Keep a microfiber cloth easily accessible to quickly wipe water drops from your lens between shots—even one droplet can ruin an otherwise perfect image. Consider using weather-sealed camera bodies and lenses if you regularly shoot in challenging conditions, though even non-weather-sealed equipment can handle light rain with proper protection. Work under natural cover whenever possible: trees, building overhangs, gazebos, or even an assistant holding an umbrella over you can provide enough protection for both you and your gear. Change lenses as infrequently as possible during rainy conditions, and when you must change, do so under cover with the camera opening facing downward to prevent moisture from entering the body. After a rainy shoot, don’t immediately seal your equipment in a camera bag where trapped moisture can cause damage. Instead, wipe everything down thoroughly, remove the battery and memory card, and leave the camera and lenses out in a dry space to air out completely. Place silica gel packets in your camera bag to absorb any residual moisture. With these protective measures in place, you can shoot confidently in rain without constantly worrying about your equipment, allowing you to focus on creativity and capturing beautiful moments.
Use Rain as a Creative Element in Your Composition
Rather than viewing rain as an obstacle, make it an integral part of your photographic composition and storytelling. Raindrops on windows create beautiful bokeh and dreamy effects, perfect for portrait photography—position your subject on one side of a rainy window with focus on them while the droplets blur into artistic circles of light. Reflections in puddles offer opportunities for creative compositions: get low and shoot the reflection of your subjects, buildings, or landscapes for unique perspectives that add depth and interest. Use a fast shutter speed (1/500s or faster) to freeze individual raindrops in mid-air, creating a dramatic effect that shows the intensity of the rainfall, or use a slower shutter speed (1/60s to 1/125s) to show rain as soft streaks that convey movement and atmosphere. Umbrellas become more than practical tools—they’re colorful props that add visual interest, create intimate spaces, and provide opportunities for creative framing. Transparent umbrellas are particularly useful for photography because they protect subjects while still allowing natural light through. Encourage subjects to interact with the rain: jumping in puddles, dancing in the downpour, or sharing an umbrella creates genuine emotion and playful energy that results in memorable images. Wet surfaces—cobblestone streets, leaves, flower petals—all gain an extra dimension when glistening with water, reflecting light and appearing more vibrant. During breaks in the rain, shoot immediately afterward when everything is still wet and reflective, but lighting conditions may improve slightly. Fog and mist that accompany rainy weather create natural layers and depth in landscape photography, separating foreground, middle ground, and background in ways that add dimension and atmosphere to your images.
Technical Settings and Practical Tips for Rainy Day Success
Shooting in rainy conditions requires some adjustments to your normal camera settings and workflow. Because rainy days are typically darker, you’ll need to increase your ISO more than usual—don’t be afraid to push it to 800, 1600, or even higher on modern cameras, as some grain is preferable to blurry, underexposed images. Use wider apertures (smaller f-numbers like f/1.8, f/2.8) to let in more light and create beautiful separation between subjects and backgrounds. If you’re shooting falling rain, remember that a faster shutter speed (1/250s or higher) will freeze the droplets, while slower speeds (around 1/60s) will show them as streaks—choose based on the mood you want to create. Shoot in RAW format rather than JPEG, as this gives you maximum flexibility in post-processing to adjust white balance, which often shifts cooler in rainy weather, and to recover details in shadows or highlights. Be mindful of your white balance settings; auto white balance often works well, but you might prefer “Cloudy” or “Shade” presets to warm up the cool tones, or embrace the cooler color temperature for a moody aesthetic. Keep extra batteries on hand, as cold and wet conditions drain battery life faster than normal. Bring more memory cards than you think you’ll need—you may shoot more as you experiment with different rain effects and compositions. For clients or models, prepare them in advance: suggest appropriate clothing (avoiding white which becomes see-through when wet), waterproof makeup, and hairstyles that look good wet or can handle moisture. Bring towels, have a warm vehicle or indoor space nearby for breaks, and keep sessions slightly shorter than you would in good weather to keep everyone comfortable and maintain positive energy. Communication is key—if everyone understands the plan and is prepared for wet conditions, the session becomes an adventure rather than an ordeal.
Post-Processing: Enhancing the Beauty of Rainy Day Photos
The editing process for rainy day photographs differs slightly from sunny day images, and understanding these differences helps you maximize the unique qualities of wet-weather photography. Start by adjusting exposure and contrast carefully—rainy day photos often benefit from slightly increased contrast to compensate for the naturally flat lighting, but be subtle to maintain the soft, atmospheric quality. White balance is crucial: you can either warm up the image slightly to make it feel cozier and more inviting, or lean into the cooler tones to enhance the moody, dramatic atmosphere. Clarity and texture adjustments can help bring out details in wet surfaces and make raindrops more prominent, but use restraint to avoid an overly processed look. When working with reflections in puddles or windows, consider slightly boosting saturation to make the reflected colors pop, creating more visual impact. Dehaze slider can be useful but use it carefully—while it can add definition to foggy scenes, overusing it removes the atmospheric quality that makes rainy day photos special. Pay attention to your blacks and shadows; rainy day photos often have deeper, richer shadows that add to their mood, so don’t feel compelled to lift them as much as you might with other images. Vignetting—slightly darkening the edges of the frame—can enhance the intimate, cozy feeling of rainy day portraits. For color grading, consider slightly desaturated looks with selective color emphasis, or embrace rich, saturated tones that highlight how vibrant colors become in wet conditions. When editing portraits taken in rain, be extra attentive to skin tones, ensuring they still look natural and healthy despite the potentially cool color cast. Remove distracting elements like bright spots or blown highlights from wet surfaces that draw attention away from your subject. Finally, trust your artistic vision—rainy day photos don’t need to look like sunny day photos. Their unique aesthetic is their strength, so edit in ways that enhance the mood and atmosphere rather than trying to “fix” the weather conditions. With thoughtful post-processing that respects and enhances the natural qualities of rainy weather photography, you’ll create images that are distinctive, emotional, and beautifully memorable.
Planning a photo session and worried about the rainy season? Don’t be! Contact Uncleshoot Photography in Bekasi today. We specialize in creating stunning images in any weather condition and know how to make rain work in your favor. Let’s embrace the beauty of rainy season photography together and create something magical!


Leave a Reply
You must be logged in to post a comment.